Windows contains dozens of extra components that are turned off by default: Hyper-V, Windows Sandbox, Windows Subsystem for Linux, .NET Framework 3.5, IIS, the Telnet client and more. This article shows how to turn them on or off in Windows 11 (and Windows 10): with the classic dialog, through Settings, with PowerShell and with DISM.
What are Windows features?
Windows has two kinds of extra functionality:
- Windows features (optional features): components that are already on your PC but turned off, such as Hyper-V, Windows Sandbox or .NET Framework 3.5. You turn them on or off in the Turn Windows features on or off dialog.
- Optional features (Features on Demand or capabilities): components Windows only downloads when you add them, such as extra fonts, language packs, WMIC, the OpenSSH server or the RSAT tools for Active Directory. You add those through Settings.
Both need administrator rights, and Windows often asks you to restart after turning something on or off.
Method 1: the "Turn Windows features on or off" dialog
The best-known method, and it works in Windows 10 and 11.
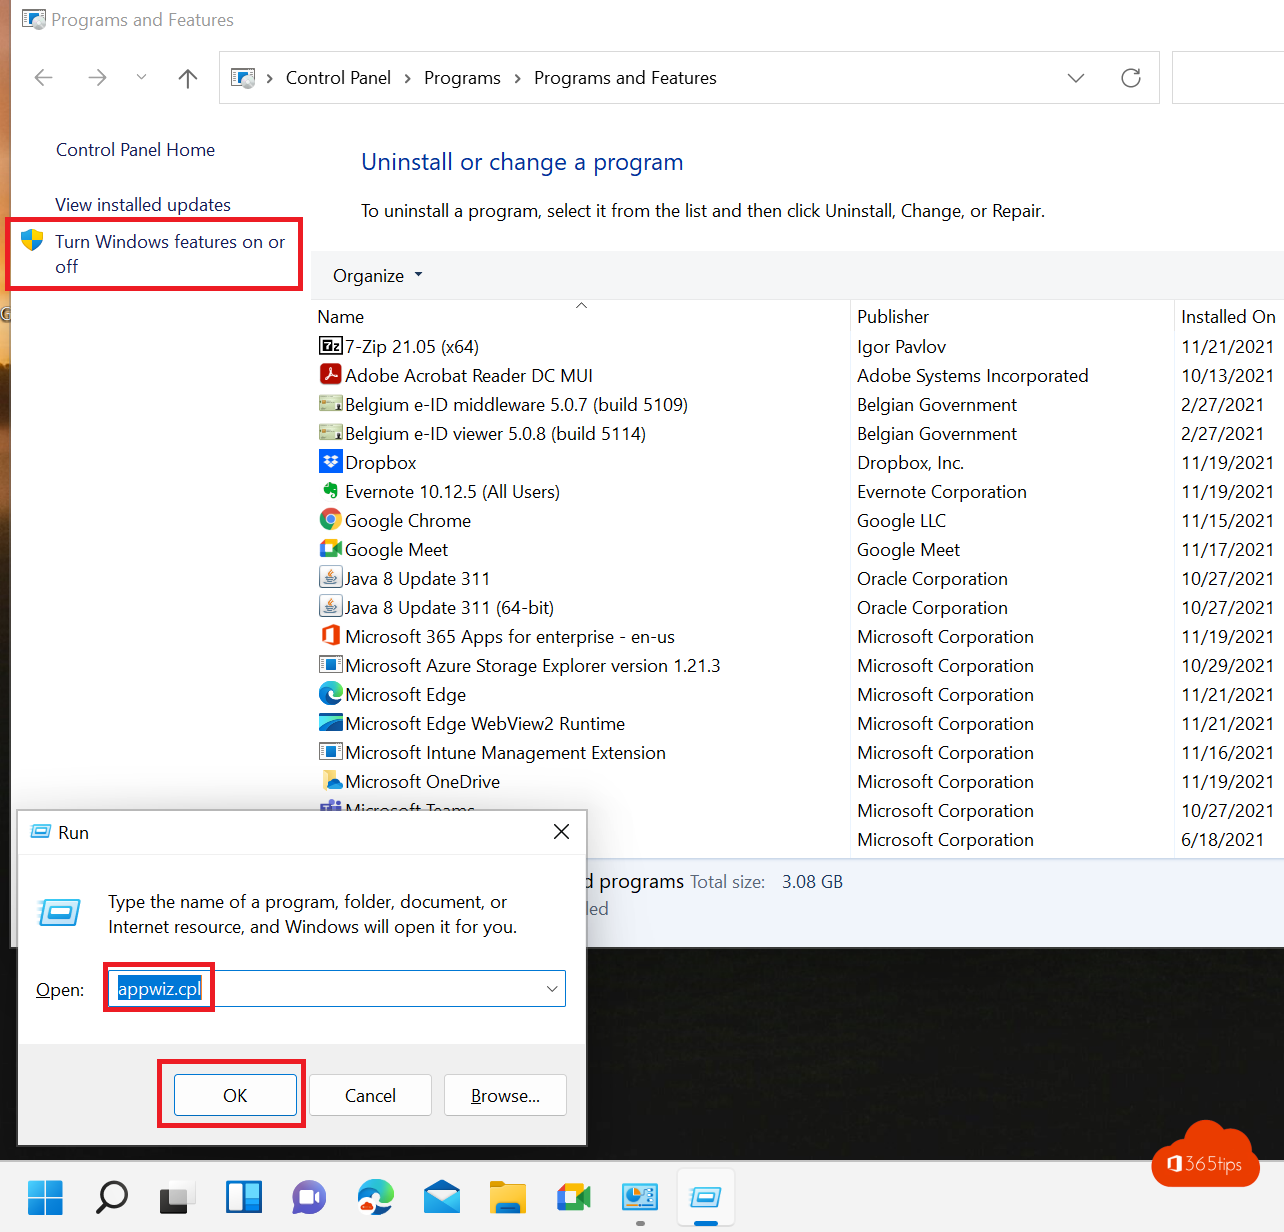
- Press Windows key + R.
- Type
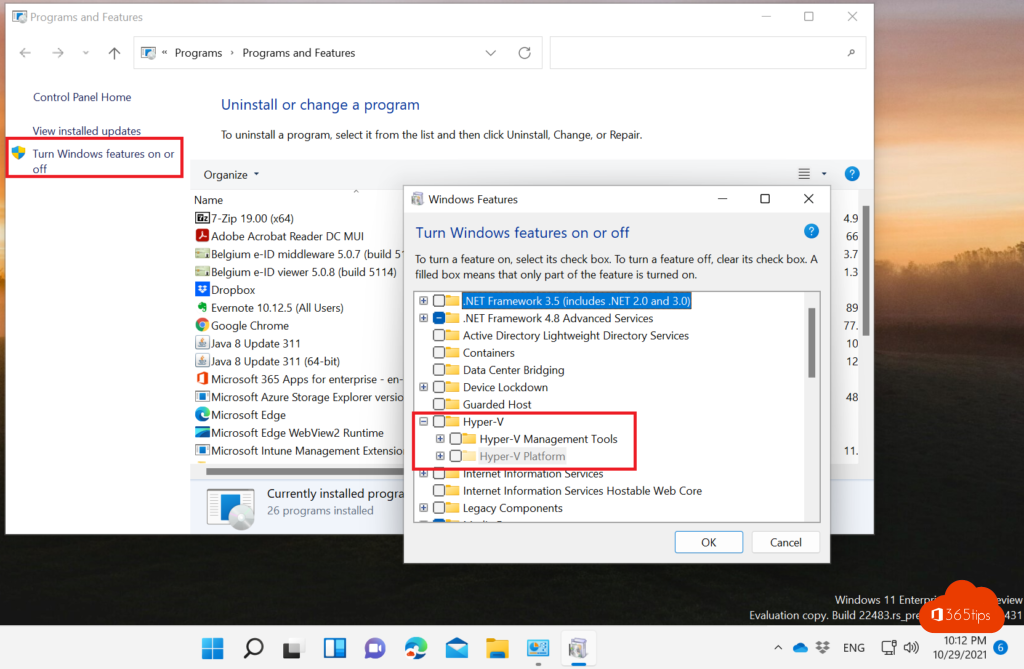
optionalfeaturesand press Enter. The dialog opens immediately. (Withappwiz.cplyou get Programs and Features; click Turn Windows features on or off on the left there.) - Tick the feature you want to turn on, or untick it to turn it off. A feature with a filled box has sub-features: click the plus sign to see them.
- Click OK and restart if Windows asks you to.
Method 2: Settings in Windows 11
In current versions of Windows 11, optional features are under Settings > System > Optional features. In older Windows 11 versions you found them under Apps > Optional features.
- Open Settings with Windows key + I.
- Go to System > Optional features.
- Next to Add an optional feature, click View features, find the feature and click Next and Add.
- To remove a feature, expand it in the Added features list and click Remove.
At the bottom of the same page, under Related settings, the More Windows features link opens the classic dialog from method 1.
Method 3: PowerShell
Open PowerShell as administrator: right-click Start and choose Terminal (Admin).
List all disabled features (in a window where you can search and filter):
Get-WindowsOptionalFeature -Online | Where-Object {$_.State -eq "Disabled"} | Out-GridViewTurn a feature on, for example Windows Sandbox:
Enable-WindowsOptionalFeature -Online -FeatureName "Containers-DisposableClientVM" -AllTurn a feature off, for example the Telnet client:
Disable-WindowsOptionalFeature -Online -FeatureName "TelnetClient"Optional features (Features on Demand) use different commands. This shows what you can still add, and installs .NET Framework 3.5:
Get-WindowsCapability -Online | Where-Object {$_.State -eq "NotPresent"}
Add-WindowsCapability -Online -Name NetFx3~~~~
Method 4: DISM
DISM also works in a normal Command Prompt (as administrator) and is handy in scripts:
dism /online /get-features /format:table
dism /online /enable-feature /featurename:NetFx3 /all
dism /online /disable-feature /featurename:TelnetClient
The most important Windows features
The name in the left column is what you see in the dialog; the technical name is what you use in PowerShell and DISM. Which features are available depends on your Windows edition and version. Get-WindowsOptionalFeature -Online shows the full list on your PC.
| Feature | Technical name | Used for |
|---|---|---|
| .NET Framework 3.5 (includes .NET 2.0 and 3.0) | NetFx3 | Older programs that need .NET 2.0, 3.0 or 3.5 |
| Hyper-V | Microsoft-Hyper-V-All | Running virtual machines. Not in Windows Home. |
| Windows Sandbox | Containers-DisposableClientVM | A disposable Windows to open unknown files safely. Not in Windows Home. |
| Windows Subsystem for Linux | Microsoft-Windows-Subsystem-Linux | Running Linux in Windows. Easier: wsl --install |
| Virtual Machine Platform | VirtualMachinePlatform | Needed for WSL 2 |
| Windows Hypervisor Platform | HypervisorPlatform | For third-party virtualization software |
| Internet Information Services | IIS-WebServerRole | A local web server |
| Telnet Client / TFTP Client | TelnetClient / TFTP | Testing network ports, configuring network devices |
| Containers | Containers | Windows containers |
| Microsoft Print to PDF | Printing-PrintToPDFServices-Features | Print to PDF from any program (on by default) |
| SMB 1.0/CIFS File Sharing Support | SMB1Protocol | Very old NAS devices and printers. Leave it off: SMB 1 is insecure. |
Installing .NET Framework 2.0, 3.0 and 3.5 in Windows 11
.NET Framework 3.5 (which also contains .NET 2.0 and 3.0) is not on by default in Windows 11. If an older program needs it, turn it on in Windows 11 24H2 and 25H2 with the dialog from method 1, with PowerShell (Add-WindowsCapability -Online -Name NetFx3~~~~) or with DISM.
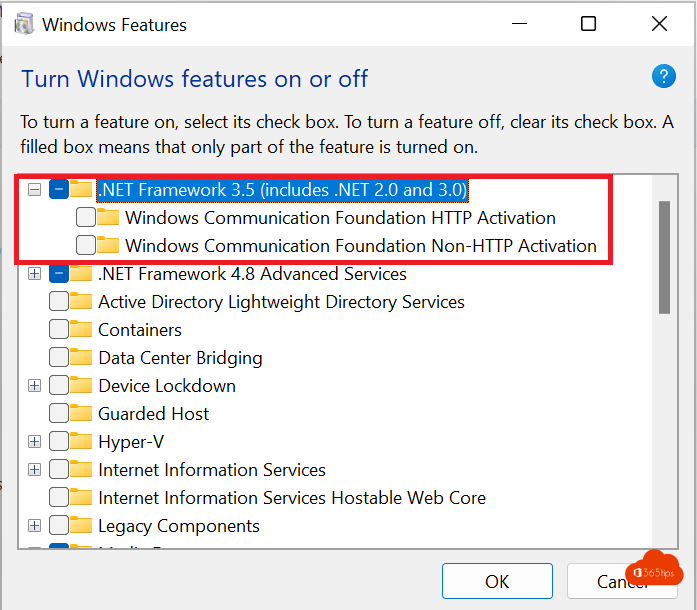
In Windows 11 versions after 25H2, .NET Framework 3.5 is no longer a Windows feature. There you download a separate installer from Microsoft. Windows 10 and Windows 11 up to and including 25H2 do not change. Keep in mind that .NET Framework 3.5 is supported until 9 January 2029.
Not working? The most common problems
- Error 0x800F0954 or 0x800F081F with .NET 3.5: this often happens on company PCs that get updates from WSUS or another update server. Use the installation files from a Windows ISO of the same version, for example:
dism /online /enable-feature /featurename:NetFx3 /all /source:D:\sources\sxs /limitaccess
Or have your administrator configure the Group Policy Specify settings for optional component installation and component repair (under Computer Configuration > Administrative Templates > System), so Windows downloads the files directly from Windows Update. - Hyper-V or Windows Sandbox is missing: you have Windows Home. Those features are only in Pro, Enterprise and Education. Also check that virtualization is enabled in the BIOS or UEFI.
- Windows PowerShell 2.0 is no longer listed: correct. Microsoft removed it from Windows 11 24H2 from August 2025. Scripts that ask for version 2 now run in PowerShell 5.1. Microsoft recommends moving to PowerShell 5.1 or PowerShell 7.
- The button is greyed out or you get "access denied": you are not an administrator on the PC.
For administrators: on many PCs at once
Need a feature on all company PCs? Put the Enable-WindowsOptionalFeature command in a PowerShell script and deploy it with Microsoft Intune (as a platform script or Win32 app), with Configuration Manager or with a Group Policy startup script. All devices are then configured the same way, and nobody needs to be a local administrator.
Read also
Run Command Prompt as administrator in Windows 11 and 10: 6 ways
Find and delete large files in Windows 11 and 10: 5 ways
How to edit the hosts file in Windows 11 and Windows 10
Nederlandstalige versie: Windows-onderdelen in- of uitschakelen in Windows 11 en 10: 4 manieren