The hosts file is a small text file on your computer in which you decide which IP address a domain name points to. Windows checks this file first and only then asks DNS. That lets you test a new website before changing DNS, point a server name to a test environment, or block a website on one computer. This article explains where the hosts file is, how to edit it in Windows 11 and Windows 10 with Notepad, PowerShell or PowerToys, and what to do when your change does not work.
Where is the hosts file?
In Windows 11 and Windows 10 the hosts file is always here:
C:\Windows\System32\drivers\etc\hostsThe file has no extension: it is called hosts, not hosts.txt. You can also write the path as %WINDIR%\System32\drivers\etc\hosts.
Method 1: Notepad as administrator
The hosts file lives in a system folder. Without administrator rights you can open it, but not save it.
- Click Start and type
Notepad. - Click Run as administrator and confirm with Yes.
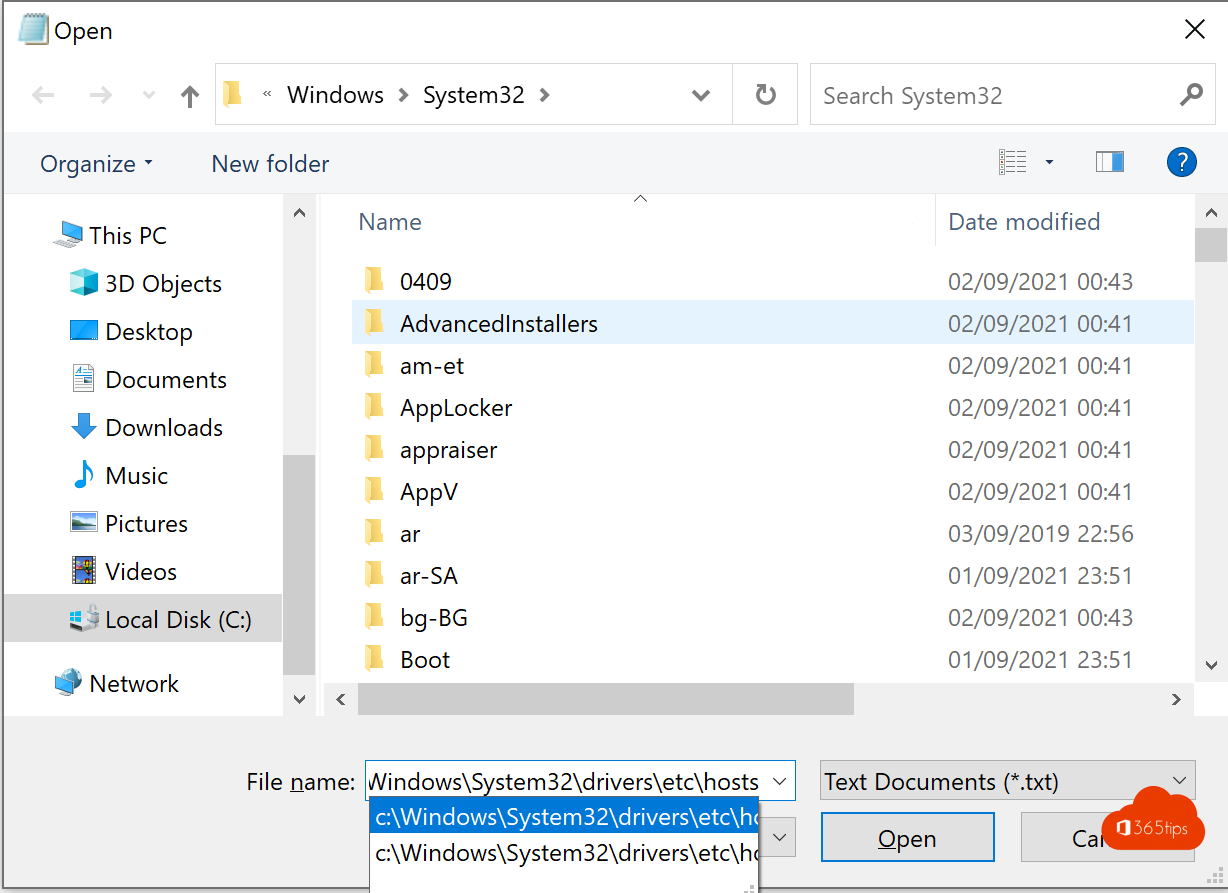
- In Notepad choose File > Open and paste
C:\Windows\System32\drivers\etcinto the address bar. - Set the file type at the bottom right to All files (*.*), otherwise the file is not shown.
- Open hosts, add your line at the bottom and choose File > Save (
Ctrl + S).


Method 2: PowerShell
Open PowerShell as administrator. This command opens the hosts file in Notepad with administrator rights:
Start-Process notepad "$env:windir\System32\drivers\etc\hosts" -Verb RunAsAdd a line without an editor (handy in scripts):
Add-Content -Path "$env:windir\System32\drivers\etc\hosts" -Value "`r`n10.0.0.25`tintranet.contoso.local"Show the contents:
Get-Content "$env:windir\System32\drivers\etc\hosts"On Windows 11 24H2 or later with sudo enabled, this works too: sudo notepad C:\Windows\System32\drivers\etc\hosts.
Method 3: PowerToys Hosts File Editor
Edit the hosts file often? Microsoft PowerToys includes a free Hosts File Editor with a clear list: add entries, switch them off temporarily, filter, and spot duplicates. Install PowerToys from the Microsoft Store or with winget install Microsoft.PowerToys, open PowerToys and launch Hosts File Editor as administrator.
How to write a hosts file entry
Each line contains an IP address, at least one space or tab, and one or more host names:
# This is a comment: Windows ignores everything after a #
127.0.0.1       localhost
10.0.0.25       intranet.contoso.local
203.0.113.10    www.yoursite.com yoursite.com
0.0.0.0 ads.example.com- One IP address per line, followed by the host name. Several names on one line are allowed.
- No
http://, no path and no port number. Only the name:www.yoursite.com, nothttps://www.yoursite.com/page. - No wildcards.
*.example.comdoes not work. Put every subdomain on its own line, including the version with and withoutwww. - To block a website, point the name to
0.0.0.0(or127.0.0.1). - To disable a line temporarily, put a
#in front of it. - IPv6 works too:
::1 localhost.
Change not working? Clear the DNS cache
Windows and your browser remember DNS answers for a while. After a change:
- Open Command Prompt and type
ipconfig /flushdns. - Close the browser completely and open it again.
- Check with
ping www.yoursite.comthat the name resolves to the right IP address.
Note: nslookup queries the DNS server directly and ignores the hosts file. Use ping, or Resolve-DnsName www.yoursite.com in PowerShell, to test your change.
Common errors
- "Access to C:\Windows\System32\drivers\etc\hosts was denied" or "You don't have permission to save in this location": Notepad is not running as administrator. Close it and open it again with Run as administrator.
- You created a file called
hosts.txt: Windows only readshostswithout an extension. Choose All files when saving, or rename the file. - The file is read-only: right-click
hosts> Properties and untick Read-only. - Microsoft Defender shows a warning or reverts your change: Defender watches the hosts file because malware uses it to send you to fake websites. Check which line caused the alert. If there is anything you did not add yourself, let Defender clean it up.
- It does not work in one browser: some browsers and VPN clients use their own DNS setting or proxy. Test with
pingfirst, then in another browser. - On a company computer: without administrator rights you cannot edit the hosts file. Ask your IT department.
Restoring the default hosts file
A default hosts file in Windows 10 and 11 only contains comment lines that explain the format. To start over, remove all your own lines (everything without a # in front), save and run ipconfig /flushdns. localhost works without a line in the hosts file.
Read also
Run Command Prompt as administrator in Windows 11 and 10: 6 ways
Turn Windows features on or off in Windows 11 and 10: 4 ways
Find and delete large files in Windows 11 and 10: 5 ways
Nederlandstalige versie: Het hosts-bestand aanpassen in Windows 11 en Windows 10